Front Fork Assembly
SAFETY FIRST: Protective gloves and eyewear are recommended at this point.
Clean all of the fork components with aerosol brake cleaner and a lint free cloth. Coat the bushings and seals with fork oil before installation. Take care to not damage the coating on the bushings during installation.
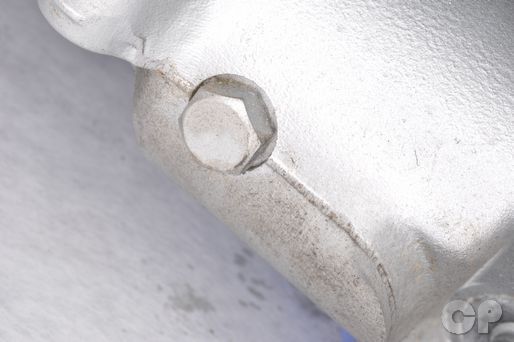
If removed, install the oil lock piece guide bolt into the right fork leg with a new sealing washer.
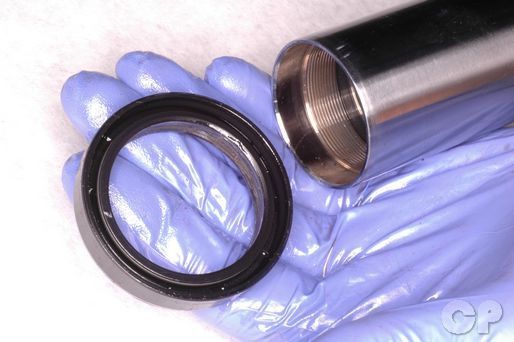
Slide the new fork oil seal down from the top to avoid damaging it on the bushing ridges.
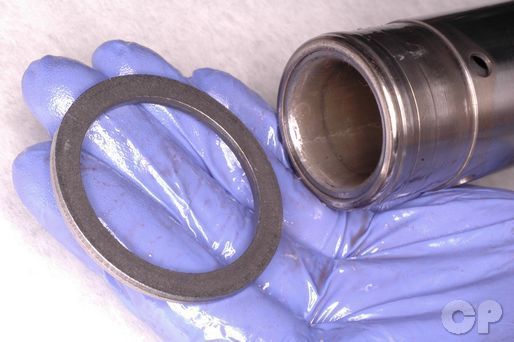
Install the oil seal backup ring below the oil seal.
Install the outer fork tube guide bushing onto the inner fork tube.


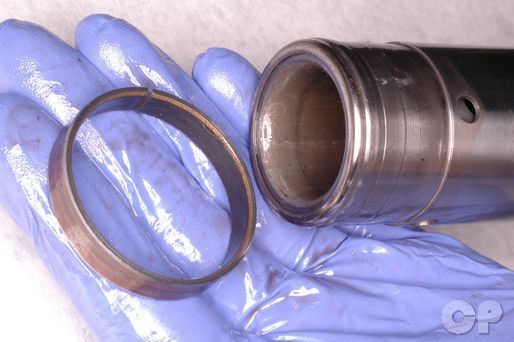
Install the inner fork tube bushing into its groove.
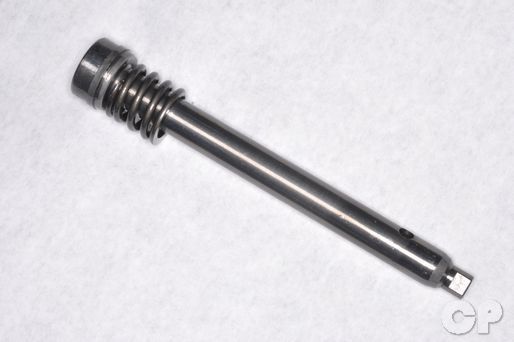
Place rebound spring on the damper rod and insert the damper rod into the inner fork tube.


Fit the oil lock piece onto the damper rod. The flat side of the damper rod must lie up correctly with the flat side of the oil lock piece.
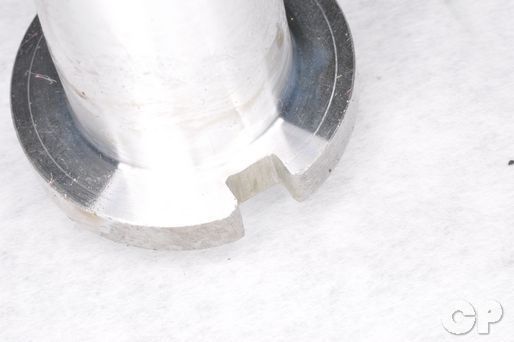


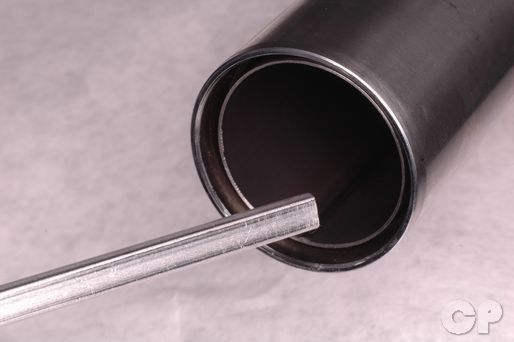
Insert the inner fork tube assembly into the outer fork tube. The notch on the bottom of the oil lock piece must line up with the oil lock piece guide bolt on the back of the right fork.


Drive the guide bushing into position using the fork seal driver. If a fork seal driver is not available, you can use a piece of PVC pipe that has been split down the middle. Make sure the bushing is fully seated in the outer fork tube.
Special Tool- Fork Oil Seal Installer: 09940-50112
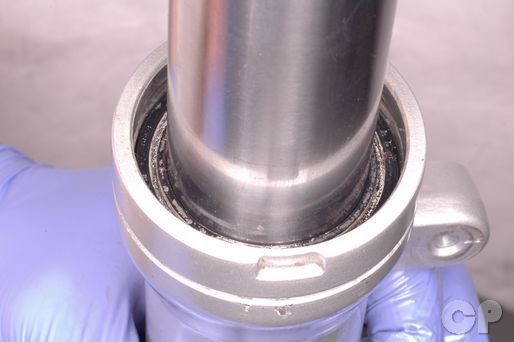
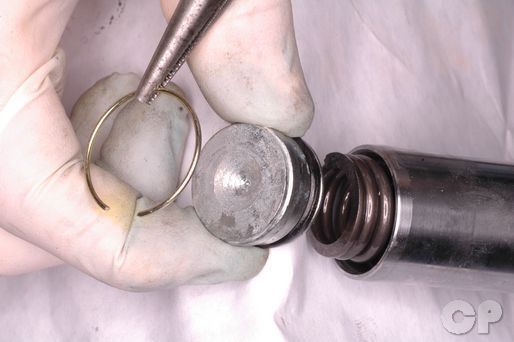
Use the same method to drive the fork seal in place until the groove for the retaining clip can be seen.


Insert the stopper ring into its groove.


Install the dust seal securely into the outer fork tube.


Clamp the fork slider in a vise using soft jaws or wood to prevent damaging the fork. Apply non-permanent Loctite to the threads of the fork bottom bolt. Install the bolt with a new sealing washer. Tighten the fork bottom bolt to specification with a 6 mm Allen. If the fork piston turns with the bolt you will have to temporarily install fork spring, washer, spacer and cap. The right side will not turn if the fork oil lock piece is installed correctly (1989 - 1997).
(Fork Bottom Bolt Torque: 15 - 25 N-m or 11 - 18 lb-ft)

Fill the fork tube with the specified quantity of fork oil. Suzuki recommends Suzuki Fork Oil SS-08 (#10).
| ITEM | STANDARD |
| Fork oil capacity (600) 1988 | 460 ml (15.5 US oz) |
| Fork oil capacity (600) 1989 - 1996 | 478 ml (16.1 US oz) |
| Fork oil capacity (600 and 750) 1997 | 505 ml (17.1 US oz) |
| Fork oil capacity (750) 1989 - 1996 | 491 ml (16.6 US oz) |
Pump the fork slowly through its stroke several times to release any trapped air. Compress the fork fully and measure the fork oil level from the top of the fork tube.
| ITEM | STANDARD mm (in) |
| Front fork oil level (600) 1988 | 134 (5.28) |
| Front fork oil level (600) 1989 - 1996 | 100 (3.93) |
| Front fork oil level (600) 1997 | 97.3 (3.83) |
| Front fork oil level (750) | 136 (5.35) |
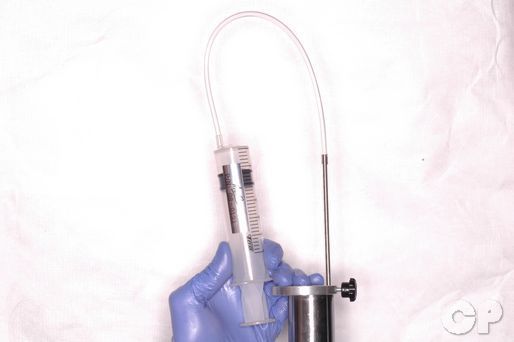
You can use a fork oil level gauge to precisely set your oil level. Remove any excess oil with a syringe, or add oil as needed.


Fully extend the fork and insert the fork spring with its tightly coiled end facing down towards the axle.


Install the washer and spacer over the fork spring and into the inner fork tube.

Place a new O-ring on the fork cap. Coat the O-ring in fork oil and thread it in hand tight into the top of the fork tube. Wait to tighten the fork cap until the forks have been installed into the fork clamps.
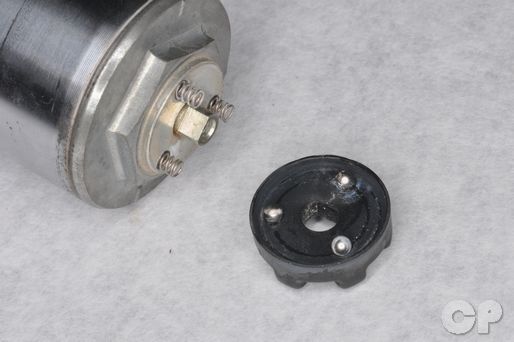


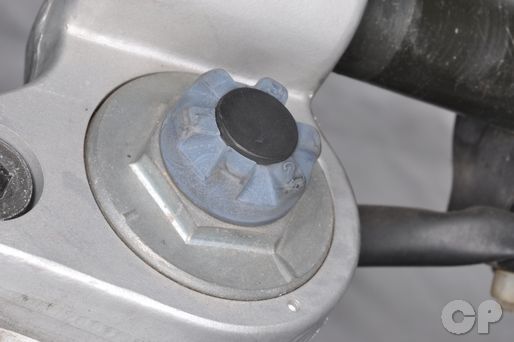
Install the three springs and ball bearings into the top of each fork cap.


Hold the adjuster in place and install the adjuster screw. Tighten the screw securely with a #2 Phillips screwdriver.


Install the damping adjuster center cap.


On the 1988 Katana 600 install the top plug. Coat the top plug O-ring in fresh engine oil. Insert the top plug into the fork and push it down until the stopper ring grove can be seen. Install the stopper ring into the groove.


Install the fork top cap.
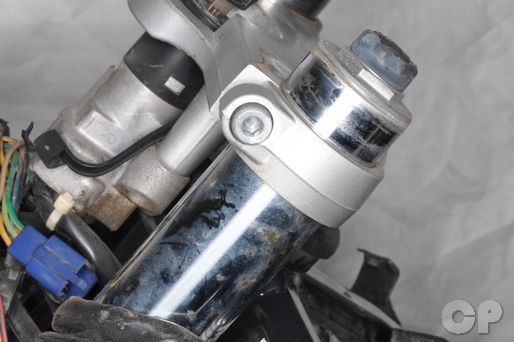
Install the front forks. See the Front Fork Installation topic for more information.
Torque the fork caps to specification with a 23 mm socket.
(Fork Cap Torque: 15 - 30 N-m or 11 - 25 lb-ft)
Return the damping adjusters to their original positions.
Copyright - Cyclepedia Press LLC

Note: If you are viewing this document offline be sure to visit the latest version online at http://www.cyclepedia.com before attempting any repairs. Updates are made without notice.